Koble GoDaddy Conversations til Gmail -kontoen min
Videresend Gmail -kontoen din til GoDaddy Conversations for å motta alle Gmail -meldingene dine i den enhetlige Conversations -innboksen, noe som gjør det enklere å administrere bedriftens kommunikasjon.
Påkrevd: Du må ha tilgang til både Conversations -kontoinnstillingene og Gmail -innstillingene for å koble til Gmail, så sørg for at du komfortabelt kan veksle mellom to nettleserfaner på enheten din før du starter.
- I en nettleser går du til GoDaddy -produktsiden for din.
Hvis du har den enkeltstående versjonen av Conversations, utvider du Conversations Unified Inbox . Velg Nettinnboks til høyre for Conversations -abonnementet.
ELLER
Hvis du har et Websites + Marketing -abonnement, blar du til Websites + Marketing og velger Administrer ved siden av nettstedet ditt. Utvid Conversations i menyen til venstre.
- Velg Innstillinger.
- Select Channels.
- Expand Email, and then select Connecct. (If you already have a connected Gmail address, select Add another.)
Note: If you have a Websites + Marketing plan and have enabled chat for your website, you’ll have a default email address to receive chat notifications. This is an internal email address created for you by GoDaddy. Connecting Gmail to Conversations will not affect this default email address.
- Velg Gmail og deretter Neste .
- Angi Gmail -adressen du vil koble til Samtaler, og velg Neste .
- Angi navnet kundene dine vil se når du sender dem en e -post, og velg Neste .
- Velg Åpne Gmail -innstillinger .
- A new tab will open, showing your Gmail settings.
Warning: Make sure you keep both tabs open because you’ll need to switch between them to be guided through the steps.
- Go back to the Conversations tab and select Copy next to the forwarding address.
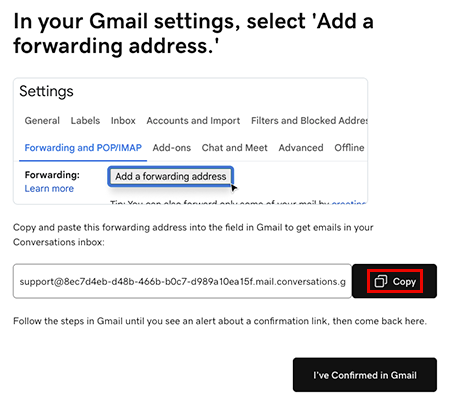
- Gå til Innstillinger -fanen for Gmail. Under Videresending og POP/IMAP velger du Legg til en videresendingsadresse , limer adressen inn i tekstboksen og velger Neste . Du må kanskje bekrefte at det er deg. Følg instruksjonene på skjermen for å gjøre dette.
- Du får en melding om at det er sendt en bekreftelseskobling til e -postadressen du skrev inn. Velg OK .
- Back in the Conversations tab, select I’ve Confirmed in Gmail, and then select Confirm Forwarding in Gmail.
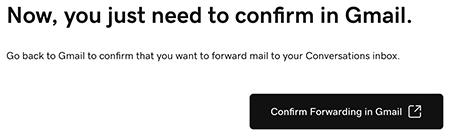
- A new tab will open, showing a Gmail confirmation. Select Confirm. When you see the Confirmation Success! message, you can close this tab.
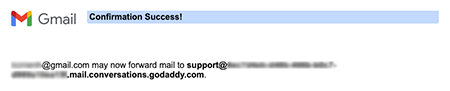
- Go to the Gmail settings tab and reload the page.
Warning: If you don’t reload the page you might not see the option to select Forward a copy of incoming mail.
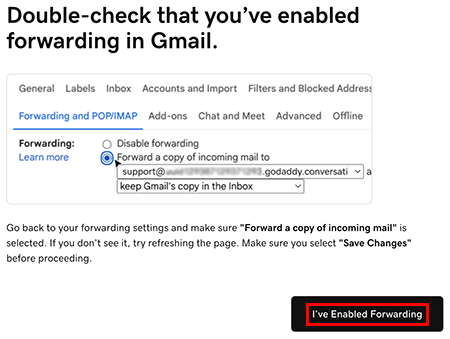
- Under Forwarding and POP/IMAP, make sure Forward a copy of incoming mail is selected. At the bottom of the page, select Save Changes.
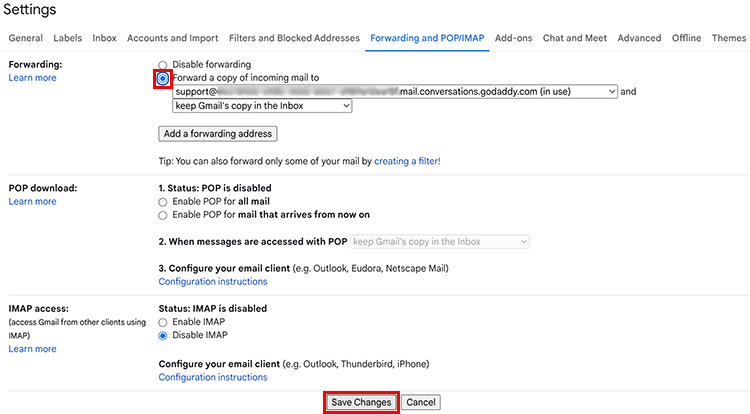
- You’ll be taken to your Gmail inbox. At the top of the page you’ll find a message saying you’re now forwarding your email.

- In the Conversations tab, select I’ve Enabled Forwarding.
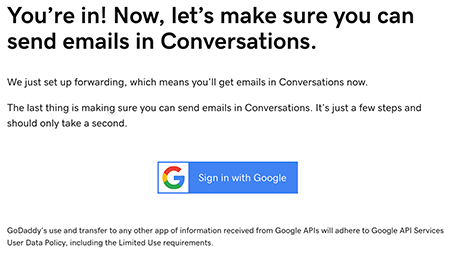
- A message will let you know you’ve successfully set up email forwarding. It could take up to 5 minutes for this message to show. Select Sign in with Google to start the process of making sure you can also reply to Gmail messages from Conversations.
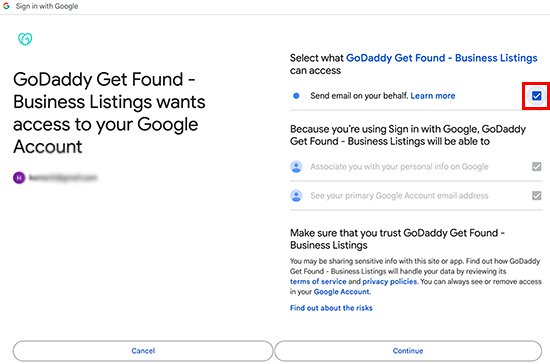
- Logg på Gmail -kontoen du koblet til Conversations og velg Fortsett .
- Make sure Send email on your behalf is checked and select Continue.
- I de siste Conversations -meldingene dine finner du en e -post som bekrefter at videresending er konfigurert.
Merk: Selv om du mottar meldinger sendt til Gmail -kontoen din i både Gmail og Conversations, vil svaret ditt ikke vises i Conversations hvis du svarer fra Gmail -kontoen din. Dette er på grunn av hvordan videresending fungerer i Gmail.
Du er klar! Du kan nå bruke den samlede Conversations -innboksen din til å administrere alle Gmail -meldingene dine, sammen med meldinger fra de andre kanalene du kobler til Conversations.